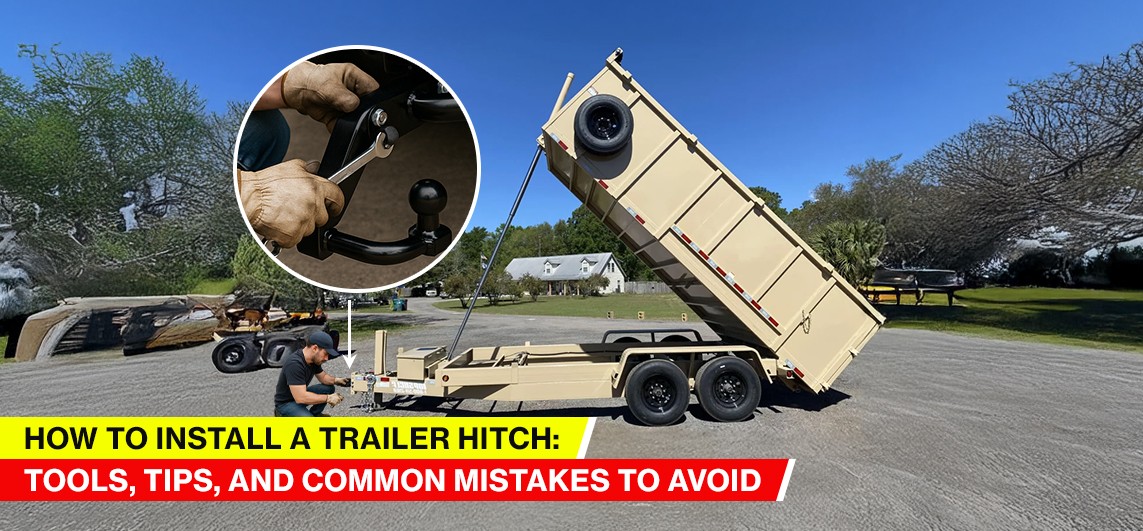
How to install a trailer hitch? Is installing a trailer hitch difficult? Can I add a tow hitch at home?
We will respond to all your queries promptly. However, you must first understand the basics of a trailer hitch.
Whether you use a trailer professionally or just for recreation, it is a must. A trailer hitch is a simple yet mandatory structural component that allows a vehicle to tow it.
The primary purpose of this hitch is safe towing across roads. However, a few types of tow hitch setups are available. So, before you get worked up about how to add a trailer hitch, let’s learn the basics, the types, and the overall functionality of one.
In this comprehensive read, we will learn the step-by-step process for installing a hitch and the required tools. We will also explore what a towing hitch kit entails for a seamless installation.
Understanding the Basics of Hitch Installation
A trailer hitch installation is vital and easy when you know the procedure. A hitch is essential whether you are moving, travelling, or shifting cargo. It helps safely tow the cargo to the vehicle and ensures a secure driving experience.
Let’s understand the types before discussing the essential hitch installation tools and procedures. After all, you must find the most compatible hitch for your trailer to enhance its functionality.
Types of Trailer Hitches
Learning about the various types of trailers helps make an informed decision when installing hitches. Here are some of the standard trailer hitch types –
1. Bumper Hitch
A bumper hitch is placed on the bumper of a pickup truck. It has a receiver tube suitable for lightweight towing practices. For instance, you can easily transport a bike rack or a cargo carrier. These hitches can handle weights of 3,500–5,000 pounds.
2. Fifth-Wheel Hitch
Fifth-wheel hitches are mounted on the pickup truck bed and fit to the kingpin of a fifth-wheel trailer. They function similarly to a tractor-trailer coupler. Fifth-wheel hitches are heavy-duty and support towing of 16,000–30,000 pounds.
3. Gooseneck Hitch
They are also installed in the bed of the pickup truck, similar to a fifth-wheel. However, they utilize a ball-and-coupler mechanism. A long, slender “neck” that extends over the truck’s tailgate and connects to the ball in the truck bed. These hitches are incredibly robust and can tow up to 20,000 to 30,000 pounds.
4. Pintle Hitch
Pintle hitches include a pintle hook and a lunette ring on the trailer. The hook latches onto the ring, creating a secure and rugged connection. They are popular for their exceptional strength and durability. A pintle hitch can handle significant weights exceeding 30,000 pounds.
5. Front Mount Hitch
Front mount hitches are installed below the bumper at the front of a vehicle. They are handy for maneuvering a trailer into a tight spot. They have a 2-inch receiver and generally support lighter loads up to 5,000 pounds.
Common Hitch Classes Explained
Different towing needs require different trailer hitches. They are categorized into classes based on their towing capacity and receiver opening. As a trailer owner, it is vital to understand these standard hitch classes.
- Class I hitches are for the lightest duty and are typically used for small cars and CUVs. They have a 1¼-inch receiver and are rated for up to 2,000 pounds of gross trailer weight (GTW) and 200 pounds of tongue weight (TW). They are ideal for bike racks, small utility trailers, or personal watercraft.
- Class II hitches feature a 1¼-inch receiver, but offer more capacity up to 3,500 pounds GTW and 350 pounds TW. They are suitable for larger cars, vans, and smaller SUVs. They can handle slightly heavier loads, such as pop-up campers or small boat trailers.
- Class III hitches are the most popular and versatile. They boast a 2-inch receiver and a capacity range of 3,500 to 8,000 pounds. They are found on trucks, SUVs, and some full-size sedans and can tow various trailers.
- Class IV hitches are heavy-duty, featuring a 2-inch receiver rated for 10,000 pounds GTW. These are designed for larger trucks and SUVs, capable of carrying loads such as large travel trailers, horse trailers, or car carriers.
- Class V hitches are the super heavy-duty option. They come with a 2-inch or 2½-inch receiver and can handle upwards of 17,000 pounds GTW. They can tackle the largest recreational and commercial trailers.
Understanding the various hitch classes and their impact on your vehicle’s towing capacity is crucial. The right hitch will make towing smooth and effortless, regardless of the type of trailer.
How to Pick the Right Hitch for Your Trailer?
Getting the right trailer hitch improves your safety and peace of mind. With various hitch types and classes available, making an informed decision is crucial. Here are the ideal factors to keep in mind –
1. Know Your Vehicle’s Towing Capacity
Every vehicle has a maximum towing capacity specified by the manufacturer. You can usually find this in the owner’s manual. Never exceed this limit, as it can lead to dangerous handling and damage to your vehicle.
2. Determine Your Trailer’s Gross Trailer Weight (GTW)
This is the total weight of your fully loaded trailer. Use a scale to obtain an accurate measurement, especially when you are unsure of the measurement. Your hitch must have a GTW rating exceeding your trailer’s weight.
3. Consider the Trailer’s Tongue Weight (TW)
Tongue weight is the downward force exerted by the trailer’s coupler on the hitch ball. It is typically 10-15% of the GTW. Your hitch and vehicle’s tongue weight rating must be able to accommodate this. Incorrect tongue weight can lead to swaying or poor braking.
4. Match the Hitch Class to Your Needs
Their capacity and receiver size define hitch classes. Once you know your vehicle’s capacity and trailer’s weight, select a hitch class that safely exceeds both.
5. Receiver Size
Conventional hitches come with either a 1¼-inch or 2-inch receiver opening. Your hitch ball mount and other accessories must be compatible with this size.
6. Towing Frequency and Type
If you tow rarely, a basic conventional hitch might suffice. A robust Class IV or V, fifth-wheel, or gooseneck hitch is a better solution for heavy-duty towing. Consider whether you have specialized tasks, such as maneuvering in tight spaces or off-roading.
Consider these factors to make a confident choice for a trailer hitch. The ultimate decision will ensure a safe, stable, and compliant towing experience.
Tools & Materials You Will Need
Before you begin with the hitch installation process, here is everything you will need –
- Socket set and torque wrench: Essential for loosening and tightening bolts for a secure and safe connection.
- Safety gear: Protects your hands from grime and sharp edges, and your eyes from debris during installation.
- Towing hitch kit: Contains specific components designed to attach the hitch to the vehicle’s frame.
- Car jack and jack stands: These are used to safely lift and support your vehicle for the necessary clearance.
- Drill: This is optional and helps create or enlarge mounting holes if not pre-drilled.
- Tow hitch insert: The component that slides into the hitch receiver, holding the hitch ball or other towing accessories.
- Hitch wiring enables the electrical connection between your vehicle and the trailer, ensuring proper functionality.
Step-by-Step: How to Install a Trailer Hitch
Now that we have all the equipment ready, let’s install the trailer.
Installing a trailer hitch might seem daunting. We have created a straightforward, step-by-step process specifically designed for beginners. Proper execution of each step is crucial for the safety and reliability of the setup.
Step 1: Read the Manufacturer’s Instructions Thoroughly
- Before grabbing a wrench, read and understand the manufacturer’s instructions for the trailer hitch. It has all the relevant sections in your vehicle’s owner’s manual.
- Each hitch is specifically designed for a particular vehicle make and model. Hence, the installation process varies significantly. The instructions will detail the exact trailer hitch mounting points, the order of bolt installation, and the required torque specifications.
- Skipping this step can lead to incorrect installation, damage to your vehicle, and unsafe towing. Pay close attention to diagrams, warnings, and recommended tools. Ensure you have everything prepared before proceeding.
Step 2: Raise and Secure Your Vehicle
- Safety is paramount when working underneath any vehicle. Begin by parking it on a flat, level, and solid surface. Use a car jack to carefully raise the rear of your vehicle to a comfortable working height.
- Once raised, place a sturdy jack stand beneath the frame to support its weight securely. Never rely solely on the jack to lift the vehicle. Give the vehicle a gentle shake to ensure it is truly stable.
- You will get the necessary clearance to access the mounting points on your vehicle’s frame. The step will allow you to maneuver the hitch into position and work without hindrance.
Step 3: Align the Hitch and Insert Bolts
- With your vehicle securely elevated, carefully position the trailer hitch beneath the vehicle’s frame. Align its mounting holes with the pre-drilled or designated attachment points.
- This step may require some maneuvering, and you may need a helping hand. Once aligned, begin inserting the bolts supplied in the hitch kit through the hitch and into the vehicle’s frame.
- During installation, you just need a few bolts to hold the hitch. Do not tighten them right away at this stage. Perfect alignment may require minor adjustments.
- Ensure all washers and nuts are in place per the manufacturer’s diagram.
Step 4: Torque Bolts to Specified Rating
- Using a torque wrench, tighten all the bolts to the precise torque specifications provided in the instructions.
- Do not guess or simply tighten them based on intuition. Under-tightening can lead to bolts vibrating loose, while over-tightening can strip threads, damage the frame, or even cause bolts to snap. Always follow the instructions and do not compromise the hitch’s structural integrity.
- Work in the sequence recommended, often tightening in stages and a crisscross pattern if applicable. Ensure even pressure distribution across all fasteners.
Step 5: Connect Hitch Wiring (if required)
- If your trailer has lights, turn signals, or electric brakes, connect the hitch wiring to the vehicle’s system.
- The step involves installing a wiring harness that plugs into your vehicle’s existing tail light or a dedicated harness port.
- Follow the instructions in the wiring kit to locate the access points and securely connect.
- Proper wiring ensures your trailer’s lights are synchronized with your vehicle. It is essential to have legal and safe towing on public roads.
Step 6: Insert Tow Hitch and Test
- With the hitch securely bolted and wired, the final step is to insert your chosen tow hitch insert into the receiver.
- If you plan to use other accessories, such as a bike rack or cargo carrier, test the fit to ensure they slide in smoothly and securely.
- Perform a visual inspection of the entire installation. Check all bolts to ensure they are torqued correctly. Confirm that all wiring connections are secure and that no obstructions or loose components are present.
With these steps, you can successfully attach the trailer hitch and be ready for any road. Remember, when in doubt, it is always best to consult with a professional or follow guidance.
How Long Does It Take to Install a Hitch?
The time it takes to add a tow hitch varies significantly depending on several factors. Presuming a specific timeframe is challenging; however, we have some assumptions based on experience.
For a seasoned mechanic or someone with prior experience and all the right tools, a standard bolt-on hitch installation on a vehicle with easily accessible mounting points might take as little as 30 minutes to 1 hour.
For a DIY enthusiast tackling it for the first time, if the installation involves more complex steps, it could easily extend to 2 to 4 hours.
Factors that prolong the process include lowering the exhaust, removing the bumper, and drilling new holes in the frame. Some may even have to deal with rusted bolts.
Vehicle-specific designs also play a huge role. Some models are much more hitch-friendly than others. Additionally, wiring for trailer lights and brakes can add another 30 minutes to 1.5 hours.
If you are in a hurry, always allocate more time than you think you’ll need, especially for the first installation.
Trailer Hitch Installation Cost
The cost of installing a trailer hitch can vary significantly, depending on several factors. Different vehicles, hitch types, and whether you do it yourself or hire a pro all affect the final expense.
Here are the main things that affect the cost –
1. Hitch Type and Class
Receiver hitches (Class I-V) are generally the most affordable. Smaller Class I and II hitches are less expensive. Class III, IV, or V hitches require more material and engineering. Specialized hitches, such as fifth-wheel or gooseneck setups, are significantly more expensive.
2. Vehicle Make and Model
Some vehicles are designed with hitch-ready frames, making installation a simple bolt-on job. Certain unibody cars or SUVs require temporarily removing the bumper, trimming plastic, or drilling. These extra steps add to the labor time and, therefore, the cost.
3. Wiring Harness Installation
You will need a wiring harness if your trailer needs lights or electric brakes. A basic 4-pin connector for lights is less expensive than a complex 7-pin system. However, wiring adds a noticeable amount to the total cost, as it involves working on the vehicle’s electrical system.
4. DIY vs. Professional Installation
Doing it yourself will save you on labor costs. You only need to pay for the hitch kit and any necessary tools. However, it requires some mechanical skill and the right equipment.
Hiring a professional means paying for their expertise and labor. Professional installation can go up to $300 for a basic receiver hitch and up to $1,000 for complex ones.
For an accurate quote, contact professional trailer and trailer hitch manufacturers. They can explain the cost and even help you find the perfect hitch.
Common Mistakes to Avoid during a Tow Hitch Setup
So far, the ‘how to add a trailer hitch’ query has been resolved. Let’s examine the common pitfalls that can compromise trailer safety and lead to a bad experience.
- The most frequent and dangerous mistake is not reading the instructions thoroughly. Many DIYers jump straight into the installation, assuming all will be the same.
- However, each hitch is designed for specific vehicle models. The instructions contain critical information on mounting points, bolt sequences, and torque specifications. Skipping this step can lead to an improperly secured hitch.
- Another significant oversight is failing to properly secure the vehicle during installation. Relying solely on a car jack to support the vehicle is extremely dangerous. Always use sturdy jack stands on a flat, stable surface. A vehicle falling off a jack can cause serious injury or even be fatal.
- Ignoring torque specifications is a critical error. Bolts are meant to be tightened to a specific force, measured in Newton-meters (Nm).
- Under-tightening can lead to potential detachment, while over-tightening can strip threads and cause the vehicle’s frame to crack.
- Many people make the mistake of not checking for obstructions before installation. Exhaust components, heat shields, or other parts may need to be relocated or modified to ensure proper operation. If the frame has rust, damage, or accident repair in the mounting areas, it could compromise the integrity of the attachment. Addressing these issues beforehand ensures a secure mount.
- Neglecting or incorrectly installing the wiring harness is a common mistake. If your trailer has lights or brakes, proper wiring is non-negotiable. Incorrect wiring can lead to non-functioning lights and damage the electrical system.
Can you install a hitch yourself and avoid these mistakes? Yes, with a little focus, you can. It is vital to be mindful during a trailer hitch installation. Read the instructions carefully and follow them diligently.
Successful Tow Hitch Installation Guide with Top Shelf Trailers
Installing a trailer hitch might seem like a significant undertaking. However, by approaching it methodically, you can achieve a successful installation. Remember, the goal is not just to attach the hitch, but to ensure it functions flawlessly.
Never underestimate the power of preparation. Gather all your tools and materials beforehand. Thoroughly read and understand the manufacturer’s specific instructions. Safety is non-negotiable. A stable work environment protects both you and your vehicle.
Also, do not rush the process. Take time with each step, especially when torquing bolts and connecting the wiring.
At Top Shelf Trailers, we pride ourselves on manufacturing top-rated dump trailers you can trust. For effective trailer hitch installation guidance, please don’t hesitate to contact us. With our expertise, you’ll be on the road with confidence and safety.
Happy towing!


