You are surely a seasoned trailer user if you have already rusted out your trailer hitch.
A trailer hitch is a steadfast companion in every hauling business. It offers structural integrity and keeps the trailer well-connected to the vehicle.
So, trailer hitch corrosion can prove dangerous on the roads, especially when towing impossible amounts of load.
If you do not clean your rusty trailer hitch, you simply compromise the trailer’s durability and strength. That is not a wise path.
So, is trailer hitch cleaning a wise decision? Well, yes, and we will teach you how.
In this comprehensive read, we will learn how to remove rust from a trailer hitch and keep it well-maintained. We will explore the essentials you must keep in-store and the step-by-step process of restoring a trailer hitch.
Let’s begin!
Why Rust Occurs On Trailer Hitch?
Why does this stubborn rust occur? It all boils down to the simple science of oxidation. Most premium trailer hitches are made of quality steel, predominantly iron.
When iron comes into contact with oxygen and moisture, a chemical reaction occurs. Electrons are transferred from the iron to the oxygen, forming iron oxide, which we know as rust.
Now that you know, you must understand why hitches are the first to get attacked. These hitches are constantly exposed to battling rain, snow, road salt, and humid air. They are prone to catching rust despite their heavy usage, irrespective of the type of trailer hitch.
However, when you ignore a rusty trailer hitch, the outcome is further concerning –
This new compound, rust, is weaker and more brittle than the original steel. The rough surface traps moisture and debris, giving rust a better foothold.
Any scratches or chips in the hitch’s original protective coating expose the bare metal, making it more prone to damage. If left unchecked, this rust spreads and eats away at the metal, weakening the entire structure.
So, trailer hitch cleaning is a necessity!
Assessing the Rust Damage
Before you search for the right tools for rust removal, it is vital to investigate the situation. A thorough analysis can help you decide on a course of action.
Here’s how to assess the rust damage on your trailer hitch –
1. Visual Inspection
Start with a thorough visual examination. How widespread is the rust condition? Is it just a light surface dusting, or are there thick, flaky layers?
Note the areas where the rust seems most concentrated. They typically attach around welds, bolts, and places where the original paint or coating might be chipped or scratched.
2. Touch Test
Gently run your hand over the rusted areas (wear gloves to avoid getting rusty!).
- Light Surface Rust: It is surface rust if it feels slightly rough or powdery and comes off easily when touched. This is the easiest to deal with.
- Flaky Rust: If the rust feels thick and flakes off in layers when you touch it, it is more advanced and will require more effort.
- Pitting: Assess the small pits or indentations in the metal surface. Pitting indicates significant corrosion and might require an aggressive tow hitch rust remover.
3. Sound Check with Tapping
Gently tap the affected areas with a small metal tool (like a screwdriver) for thicker rust. A solid sound indicates the metal underneath is fine. A hollow or flaky sound suggests significant internal corrosion.
4. Check Critical Areas
Pay close attention to crucial parts of the hitch, such as –
- Welds: Rust around welds compromise the strength. Look for signs of separation or significant corrosion.
- Mounting Points: Examine where the hitch attaches to your vehicle’s frame. Heavy rust here could be a safety concern.
- Receiver Tube: Check the inside and outside of the trailer attachments’ tube. Rust buildup inside can make it difficult to insert and secure accessories.
- Safety Chain Loops/Attachment Points: Ensure these crucial safety features aren’t significantly weakened by rust.
5. Consider the Age and History
How old is your trailer hitch? Has it been regularly exposed to harsh conditions? Knowing its history can give you clues about the potential extent of the rust damage.
Effective assessment offers a better idea of the tools and measures needed. The ideal techniques will remove the rust and protect your trailer hitch in the future.
Materials and Tools for Rust Removal
The correct set of equipment is downright necessary for a job well done. It will remove the rust effectively and not damage the hitch. Similarly, it will make the job smoother, and you will learn the correct methods
1. Safety First
- Work Gloves: Protect your hands from sharp edges, rust particles, and cleaning solutions.
- Safety Glasses: Essential to shield your eyes from flying debris and chemical splashes.
- Dust Mask: This is especially vital when dealing with a lot of dry, flaky rust or using power tools that can create dust.
2. For Initial Cleaning and Loosening Rust
a. Wire Brush (Various Sizes and Stiffness)
- Stiff Bristle Brush: Ideal for tackling heavy, flaky rust.
- Softer bristle brush: This is useful for more delicate areas and final clean-up.
For efficiency, consider both handheld brushes and drill-mounted wire wheel brushes. They can effortlessly tackle larger, less intricate areas.
b. Scraper (Plastic or Metal)
For gently removing loose, thick layers of rust without damaging the underlying metal. A plastic scraper is less likely to scratch paint if any remains.
Shop Rags or Old Towels: These are for wiping away loose rust and debris and for cleaning solutions.
c. Water Hose with a Spray Nozzle
- For rinsing off loose debris and cleaning solutions.
- Mild Soap or Degreaser: Clean the hitch before rust removal and remove any residue afterward.
3. For More Stubborn Rust Removal
a. Penetrating Oil or Rust Remover Spray
These chemical solutions can help loosen stubborn rust and make removing it easier with manual tools. Follow the manufacturer’s instructions carefully regarding application and dwell time.
b. Sandpaper (Various Grits)
- Coarse Grit (e.g., 80-120): To remove heavier rust.
- Medium Grit (e.g., 150-220): To smooth the surface after using coarser grits.
- Fine Grit (e.g., 320+): Final smoothing before applying a protective coating.
- Consider using sanding blocks for a more even finish on flat surfaces.
c. Power Drill with Attachments (If Available)
- Wire Wheel Brushes: Significantly speed up the removal of surface rust on larger areas. Be cautious around intricate parts and welds.
- Sanding Discs: For efficient sanding on larger, flatter surfaces.
- Flap Discs: A good option for rust removal and surface smoothing.
d. Rust Converter (Optional)
This chemical treatment reacts with the rust, converting it into a stable, paintable surface. It does not remove the rust entirely but neutralizes it and prevents further corrosion. Follow the product instructions carefully.
4. For Protecting the Cleaned Hitch
a. Rust-Inhibiting Primer
A primer specifically designed to prevent rust from returning. Choose one suitable for metal.
b. Durable Top Coat Paint
Provides a protective layer against the elements and wear and tear. A truck bed liner offers excellent durability but can create a textured finish. Choose paint suitable for outdoor metal use.
c. Paintbrushes or Spray Paint
Depending on the type of paint you choose and the desired finish. Spray paint offers a more even coat, especially on intricate areas.
d. A Useful Item:
Elbow Grease and Patience! Rust removal can sometimes be time-consuming, especially for heavily rusted hitches.
These materials and tools on the ready will set you up for success in removing rust and protecting your trailer hitch for years. Remember to choose the right tools based on the severity of the rust and the complexity of your hitch’s design.
How to Remove Rust from Trailer Hitch – A Step-by-Step Process
Now, let’s get down to the nitty-gritty and walk through ‘How to remove rust from trailer hitch?’ We have sectioned it into steps for you to utilize easily. Remember to prioritize safety by wearing gloves and safety glasses.
Step 1: Initial Cleaning and Preparation
- Rinse the Hitch: Use your water hose to thoroughly rinse any loose dirt, grime, salt, or debris from the trailer hitch. This will give you a clearer view of the rust and prevent you from grinding dirt into the metal.
- Apply Mild Soap or Degreaser (Optional): If your hitch has significant grease or grime buildup, wash it with mild soap or a degreaser. Use a brush to scrub away stubborn residues, and then rinse thoroughly with water.
- Dry the Hitch: Allow the hitch to air dry completely, or use clean rags to dry it thoroughly. Working on a dry surface will make rust removal effective.
Step 2: Loose Rust
1. Manual Scraping
Use a plastic or metal scraper to remove any thick, loose flakes of rust gently. Work carefully to avoid gouging the underlying metal. This step helps to remove the bulk of the corrosion before moving on to aggressive methods.
2. Wire Brushing
A stiff wire brush removes the remaining loose rust. Apply firm pressure while working back and forth along the affected areas. Be attentive to seams, welds, and corners where rust accumulates. Switch to smaller or differently shaped wire brushes to access tight spots.
3. Rinse Again (If Necessary)
If you have generated a lot of rust dust, you can rinse the hitch again with water. The more transparent the surface, the better the view of the remaining rust. Ensure it is dry before proceeding.
Step 3: Stubborn Rust
This is where you might need to choose one or more of the following methods depending on the severity of the rust. Stubborn rust is sitting there for too long; a professional approach is a must –
1. Penetrating Oil/Rust Remover
Apply the penetrating oil or rust remover spray liberally to the rusted areas. Follow the manufacturer’s instructions regarding application and soak time. This allows the chemical to penetrate and loosen the rust.
After the recommended dwell time, use your wire brush or scraper to remove the rust. It should come off easily.
Rinse the hitch thoroughly with water to remove any chemical residue and dry it thoroughly.
2. Sanding
- For areas with significant rust, start with coarser grit sandpaper (e.g., 80-120). Sand in smooth, overlapping strokes for a better outcome.
- Gradually move to finer grits (e.g., 150-220, then 320+) to smooth out the surface and remove any scratches left by the coarser paper. The goal is to create a clean, relatively smooth surface for priming and painting.
- Wipe away sanding dust frequently with a clean rag.
3. Power Drill with Attachments (Use with Caution)
- Wire Wheel Brush: Attach a wire wheel brush to your power drill. Work carefully, applying light to medium pressure. Keep the drill moving to avoid focusing too much on one spot, which can damage the metal. Be especially cautious around intricate areas and welds. Wear safety glasses, as the wire bristles can sometimes detach.
- Sanding Discs/Flap Discs: Attach appropriate sanding or flap discs to your drill. These are effective for larger, flatter surfaces. For example, with manual sanding, start with a coarser grit and gradually move to finer grits. Maintain consistent, even pressure.
Using a power drill is not mandatory. It only helps the process and escalates the removal. If you are adept at handling the machine, we suggest a go-ahead.
4. Rust Converter (If Using):
- If you have opted for a rust converter, apply it directly to the rusted areas after removing as much loose rust as possible.
- Apply the converter according to the manufacturer’s instructions. It typically needs to dry completely and may leave a black or dark purple residue, a stable, paintable surface. Do not rinse after applying the rust converter unless the instructions specify.
Step 4: Final Cleaning and Preparation for Protection
- Thorough Cleaning: Once you have removed the rust to your satisfaction, thoroughly clean the entire trailer hitch. Use mild soap and water or a degreaser to remove any remaining rust, dust, and other debris.
- Final Rinse: Rinse the hitch thoroughly with clean water.
- Complete Drying: Ensure the trailer hitch is dry before proceeding to the next step. Moisture trapped under the primer or paint will lead to rust returning. You can use compressed air or allow air-drying time.
Step 5: Protecting Your Trailer Hitch
1. Apply Rust-Inhibiting Primer
Apply a thin, even coat of rust-inhibiting primer to all the cleaned metal surfaces of the trailer hitch. This is a crucial step in preventing future rust. Follow the manufacturer’s instructions for application and drying time. For better coverage, apply multiple thin coats rather than one thick coat.
2. Apply Top Coat Paint
Once the primer is completely dry, apply one or two coats of durable topcoat paint. We suggest an enamel or truck bed liner. Again, follow the manufacturer’s instructions for application and drying time.
Ensure you achieve good coverage on all surfaces, especially areas prone to wear and tear. If using spray paint, apply in smooth, overlapping strokes, holding the can at the recommended distance.
3. Allow to Cure
Allow the paint to fully cure according to the manufacturer’s instructions before using your trailer hitch. This ensures that the protective coating is rugged and durable.
Remember that the effort required will depend on the extent of the rust damage. You should repeat some steps or spend more time on the rust removal phase for heavily rusted hitches.
Prevention and Long-Term Care
You have gone through the effort of removing the rust. Let’s talk about keeping it away for good!
Consistent prevention and long-term care help extend the life of your trailer hitch. Proper trailer hitch maintenance can save you money on future rust removal expenses.
Here are some quick takeaway points on how to keep your hitch in top shape –
Prevention and Long-Term Care
- Remember to rinse your trailer hitch with fresh water after each use, especially after rain, snow, or salty road exposure. This washes away corrosive elements before they can cause damage.
- Periodically inspect the paint or protective coating on your hitch. If you notice any chips or scratches, touch them up promptly with rust-inhibiting paint to prevent exposed metal. Consider applying a fresh coat of durable paint or rust preventative spray, depending on usage, every year or two.
- Apply a silicone-based lubricant or grease to moving parts like the ball mount and any locking mechanisms. This prevents ball mount rust and ensures smooth operation.
- Suppose you remove your trailer hitch when not in use and store it in a dry place, away from moisture and extreme temperature fluctuations. This significantly reduces the chances of rust formation.
- Periodically examine your trailer hitch for any signs of new rust development. Focus on the parts like the welds and mounting points. Catching small spots of rust early makes them much easier to deal with before they spread.
- Consider applying a rust inhibitor spray or coating designed for protection in areas with harsh winters and heavy road salt use. These products create a barrier against corrosive elements.
- If your vehicle is often parked outdoors, consider using a hitch cover when not towing. This offers an extra layer of protection against the elements.
With some solid measures, you can significantly reduce the likelihood of rust returning to your hitch. Trailer maintenance and protection ensure longevity and reliable performance for all your hauling needs.
Removing Trailer Hitch Rust the Right Way with Top Shelf Trailers
So, there you have it – a proper answer to your persistent query – ‘How to remove rust from a trailer hitch?’
Investing time in removing rust from your trailer hitch and implementing preventative measures is an investment. It contributes to your towing setup’s longevity, safety, and overall functionality.
This guide is a must-have for a professional who deals with hefty towing tasks daily. Although it might seem like a chore initially, the peace of mind with a well-maintained, rust-free hitch is worth the effort.
Here’s a tip: Regular care and attention will save you from more extensive repairs.
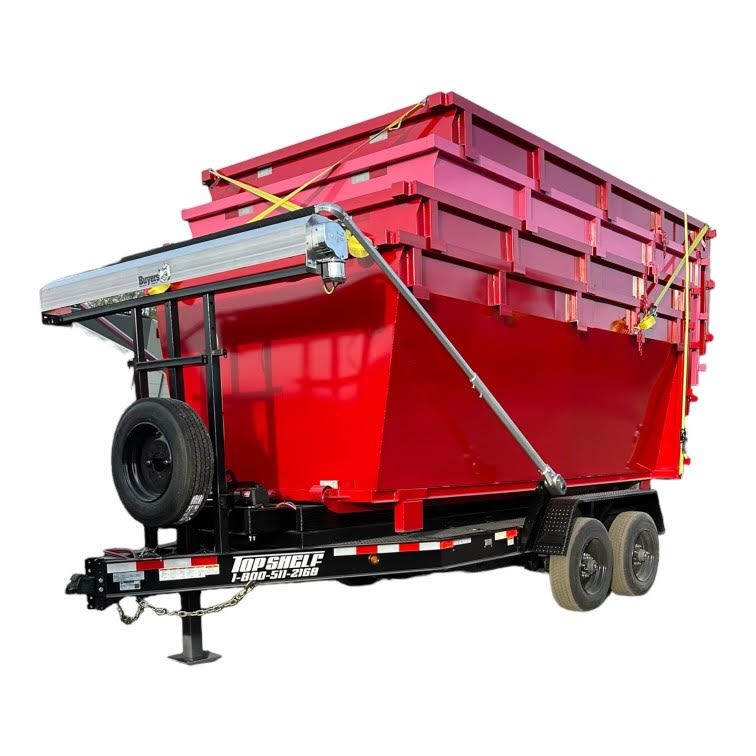
Speaking of quality, if you are searching for a dump trailer or quality towing equipment, check out Top Shelf Trailers. We are the best manufacturers of top-notch trailers and equipment. As a leading brand, we understand the value of a robust towing setup. Whether you need a brand new trailer or are wondering how to remove rusted hitch, contact Top Shelf Trailers!