You just bought your first hauling trailer for your business, or you may be upgrading your current setup. Well, you cannot skip safety—it is supreme.
And, the top safety factor – Brakes! We are talking about the trailer brakes and the controller.
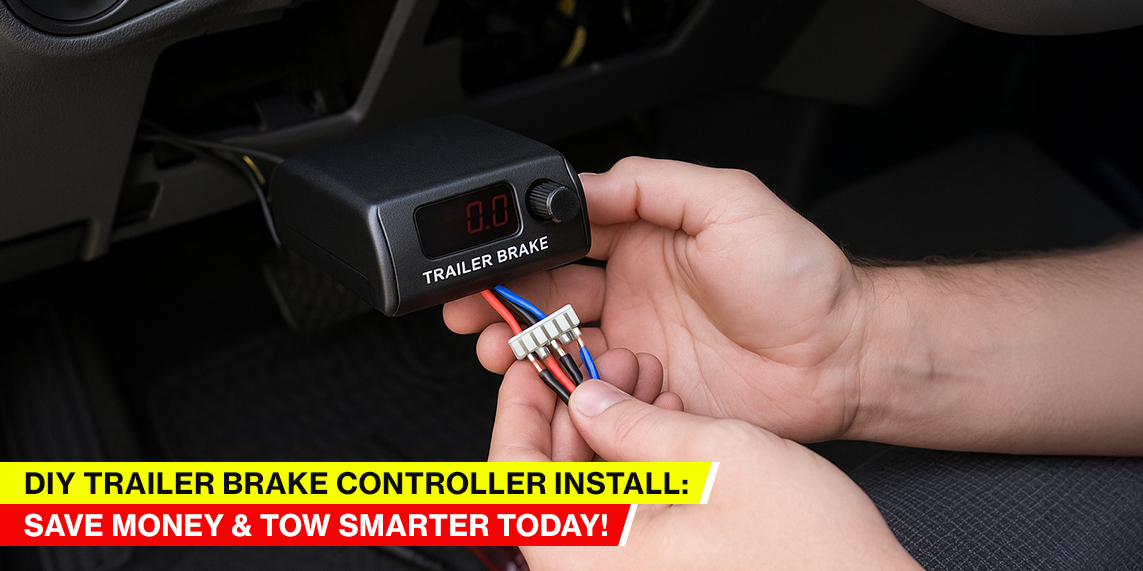
Towing trailers typically boast electric brakes. These brakes get activated via an electrical signal once the tow vehicle’s pedal is kicked. The trailer brake controller allows you to control the trailer brake from the towing vehicle. You can install this piece yourself.
Do not let the thought of installing a trailer brake controller send shivers down your spine! It is an achievable DIY project that will save you time and money.
This comprehensive read will examine the trailer brake controller install procedure before hitting the road. We will also mystify some myths and learn about some accessible installation tools.
We hope your confidence is high!
What Is a Trailer Brake Controller?
There are various trailers on the market, varying in size and usability. They come equipped with a functional braking system.
How do the trailer brakes know when to activate, and with what force? Here comes that one safety device: the trailer brake controller.
A trailer brake controller is an electronic device that acts as a bridge. It connects the tow vehicle’s braking system and your trailer’s electric or hydraulic brakes.
How does a trailer brake controller work?
When the brake pedal in the car gets active, the controller sends a modulated electrical signal to the trailer’s brakes. It causes them to engage in sync with the tow vehicle.
Without a brake controller, your trailer pushes against your vehicle when you slow down. The impact would lead to unsafe stopping distances, excessive wear on the vehicle’s brakes, and an uncomfortable ride.
So, yes, a trailer brake controller is mandatory for safe towing.
Types of Trailer Brake Controllers
| Feature | Time-Delayed | Proportional |
| Response | Slower | Instantaneous |
| Brake Smoothness | Less Smooth | Smooth & Predictive |
| Cost | More Affordable | More Expensive |
| Installation | Easier | Slightly Complex |
| Best For | Occasional Towing | Regular/Heavy Towing |
For trailer brake controllers, there are two distinct types: time-delayed and proportional.
Each has its way of operating and ideal use case. Understanding the differences helps choose the right one for towing needs.
Time-Delayed Brake Controllers for Trailers
They are the more straightforward and more budget-friendly option. As the name suggests, a time-delayed controller applies a pre-set braking power. There is always a slight delay once the tow vehicle’s brake pedal is active.
Here is how they generally work –
- Fixed Power: You manually set the controller’s output level, determining the maximum braking force the trailer will receive.
- Gradual Application: When you press your brake pedal, the controller directs the power to the trailer brakes over a fixed period. This effect applies regardless of how hard you brake your tow vehicle.
- Less Refined: Since the braking force is not direct, time-delayed controllers sometimes lead to less smooth stops. You might feel a slight push or pull from the trailer.
- Best For: Lighter trailers, occasional towing, or situations where precise, synchronized braking is not as critical. They are ideal for lower cost and straightforward installation.
Proportional (Inertia-Based) Brake Controllers for Trailers
They are the more advanced and widely recommended type of trailer brake controller. These are typical for heavier trailers and frequent towing.
Proportional controllers use an internal accelerometer to detect the deceleration rate of the tow vehicle.
Here is why and when they are preferred –
- Synchronized Braking: When you brake your tow vehicle, the proportional controller senses the quick slowing down. It then applies a proportional amount of braking force to the trailer. If you brake gently, the trailer brakes gently. If you slam on the brakes, the trailer brakes with similar force.
- Smooth and Responsive: Matching braking effort in real-time results in softer and more controlled stops. It minimizes jerk and reduces wear and tear on both vehicles.
- Adapts to Conditions: Proportional controllers automatically adjust to various road conditions and trailer weight. Going downhill with a heavy load? The controller will increase the trailer’s braking power to compensate. Towing an empty trailer uphill? It will reduce the braking to prevent the tires from locking up.
- They are best for heavier trailers, frequent towing, and hauling sensitive or valuable cargo. Anyone who prioritizes smooth and safe towing will benefit from them. They are expensive but worth investing in.
Why DIY Trailer Brake Controller Installation?
Self-scrutinizing and altering your vehicle’s electrical system might seem daunting. However, there are several compelling reasons why a DIY trailer brake controller installation process is a fantastic idea.
1. Cost Savings
| Item | Estimated Cost |
| Brake Controller Unit | $50 – $250 |
| Wiring Harness | $10 – $50 |
| Installation (DIY) | Free – $100 |
| Installation (Professional) | $100 – $300 |
| Total | $160 – $600 |
Professional labor rates can add up quickly. A shop installing a trailer brake controller can cost $150 to $500 or more, depending on the complexity of your vehicle and the shop’s rates.
By doing it yourself, you eliminate labor costs. The money you save can be used for other essential towing gear.
2. Understanding Your Vehicle
A DIY installation forces you to learn about your vehicle. You can master the wiring of a trailer brake controller, fuse box, and general layout. The hands-on experience can be incredibly valuable. You can better understand how your tow vehicle and trailer communicate. The practice can be invaluable for troubleshooting or adding other accessories.
3. Satisfaction of a Job Well Done
Completing a DIY project offers a unique sense of accomplishment. Stopping your trailer confidently with the brake controller you installed provides a sense of pride.
4. Customization and Control
You have complete control over where the controller is mounted, choose how the wires are routed, and ensure everything is done to your satisfaction.
With DIT, you can take your time, double-check connections, and ensure a clean, professional-looking install that meets your specific needs.
Professional installers are generally good. However, the DIY approach allows a level of meticulousness and feasibility.
5. Learning New Skills
Installing a trailer brake controller is a relatively straightforward electrical project. It involves basic wiring, crimping, and routing. It is a great entry point into automotive DIY and teaches valuable skills.
Trailer Brake Controller Installation Kit
Remember, the exact contents can vary slightly between manufacturers and vehicle models. However, a typical installation kit for a plug-and-play setup will generally include –
1. Vehicle-Specific Wiring Harness
This is arguably the most critical component in a modern installation. Many newer trucks come pre-wired from the factory with a dedicated plug for a brake controller.
The harness plugs directly into that factory port. The other end has the correct connector for your specific brake controller.
The component eliminates complex trailer brake controller wiring and significantly speeds up installation. It typically includes wires for 12V power, ground, brake light signal, and the output to the trailer.
2. Mounting Bracket and Hardware
Your brake controller needs to be securely mounted inside your vehicle. The spot is typically under the dashboard, within easy reach of the driver.
The kit will usually include a sturdy metal or plastic bracket and screws or bolts to attach the controller to the structure.
3. Zip Ties or Wire Loom
Zip ties are essential for securing the harness and keeping the wiring neat and protected. They are placed under the dash, preventing the harness from dangling or interfering with the pedals.
Some kits include sections of wire loom for added protection against abrasion.
4. Self-Tapping Screws
Many harnesses include a ground wire that connects directly to the vehicle’s factory wiring. Other installations require you to create a chassis ground point.
In such cases, self-tapping screws secure a ring terminal to a clean, unpainted metal surface on the vehicle’s frame or body.
5. Fuses and Circuit Breakers
Modern plug-and-play harnesses usually utilize existing factory fuses. Older or more universal kits include an inline fuse holder, appropriate fuses, or even an auto-resetting circuit breaker.
These are crucial for protecting your vehicle’s electrical system from overload. Always ensure your brake controller circuit is fused correctly.
6. Instruction Manual
Lastly, a detailed instruction manual is the DIY roadmap. It will provide specific steps for the particular kit and include diagrams for clarity.
Before purchasing, verify that the installation kit matches your tow vehicle’s make, model, year, and brake controller. A quick search online can confirm compatibility and ensure you have all the necessary components.
Tools and Materials You Will Need
- The choice of trailer brake controller
- Vehicle-specific wiring harness for your controller
- Basic hand tools: Screwdrivers, socket set, wire strippers/crimpers
- Drill and drill bits (for mounting bracket, if needed)
- Zip ties
- Work light
- A multimeter or circuit tester (helpful for identifying wires if you don’t have a plug-and-play harness)
- Safety glasses
How to Install Trailer Brake Controller?
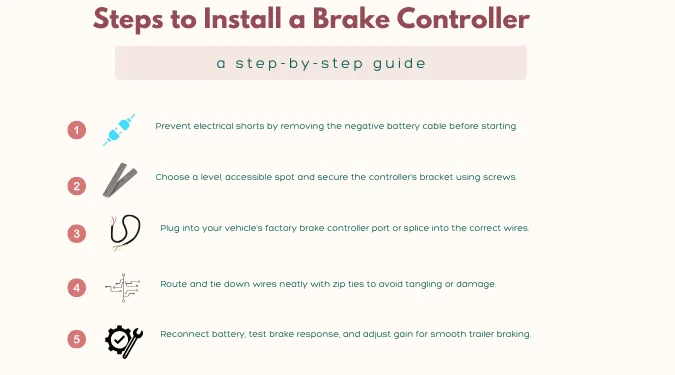
Now that you are ready for the trailer brake controller installation process let us begin.
While specific instructions vary slightly based on your vehicle’s make and model and the brand of your controller, the general steps are quite consistent.
Important Safety Note: Always disconnect your vehicle’s negative battery terminal before starting any electrical work. This prevents accidental shorts, damage to vehicle electronics, and potential injury. Allow a few minutes for any residual power to drain from the system.
1. Choose Your Mounting Location
This is a crucial first step. You need a spot that is –
A. Accessible
You should be able to easily reach the manual override lever and see the display without being distracted from driving.
B. Out of the Way
It should not obstruct your view of the road, interfere with pedals, or block airbags.
C. Secure
It needs a solid surface to mount to. Common locations include under the dash, to the left or right of the steering column, or on the center console.
D. Level and Aligned
If you have a proportional controller, it must be mounted at a relative level to the ground. For it to function correctly, the internal accelerometer must also align with the direction of travel. Avoid mounting it upside down or sideways.
2. Mount the Controller Bracket
- Once you decide on the location, use the mounting bracket as a template to mark the drill holes.
- Carefully drill pilot holes. Be extremely cautious to ensure you are not drilling into existing wiring, ducts, or other critical components. Remove the dash panel for better visibility.
- Secure the mounting bracket using the screws provided in your kit. Do not over-tighten, especially if using self-tapping screws into plastic. You could strip the holes.
3. Locate Your Vehicle’s Factory Brake Controller Port
Modern trucks and SUVs have a dedicated plug located under the dash. It is typically near the steering column or behind a removable panel, taped up or tucked away. Consult the vehicle’s owner’s manual or an online forum for your vehicle model to pinpoint its exact location. This is where your vehicle-specific wiring harness (pigtail) will connect.
4. Connect the Wiring Harness
- Take your vehicle-specific wiring harness. One end will typically plug into your vehicle’s factory brake controller port.
- The other end of this harness will have a connector that plugs directly into the back of your new brake controller. Align the pins and push firmly until the connector clicks into place.
- If your vehicle does not have a factory harness, you will have a universal harness with blunt wires. You must identify your vehicle’s brake signal wire and 12V power and ground and splice them into the universal harness wires using wire strippers and crimp connectors. This is more involved and may require an electric brake controller wiring diagram.
5. Secure the Wiring and Mount the Controller
- Use zip ties to neatly secure excess wiring up and out of the way once the harness is connected. Ensure it does not interfere with pedals, steering, or moving parts.
- Attach the brake controller to its newly installed mounting bracket using the hardware provided with the controller.
6. Reconnect the Battery and Test
- Reconnect the negative battery terminal.
- Turn your vehicle’s ignition or start the engine. Your brake controller must power up and display information.
- Pull the manual override lever on the brake controller with the trailer connected. You should hear the trailer brakes engage, and the controller’s display should show output.
- Gently press your vehicle’s brake pedal. The controller should activate and show output to the trailer brakes.
7. Put The Trailer Brake Controller to the Test
Here is how to test a trailer brake controller –
Drive slowly in a safe, open area and apply your brakes. Observe how the trailer responds. It should slow down smoothly and be in sync with your car. If it feels like the trailer is pushing or pulling, you must adjust the gain setting on your controller.
A. Adjusting the Gain
- The gain setting determines the maximum braking power sent to the trailer.
- Start with a lower setting as recommended by the controller’s manual.
- If the trailer brakes feel weak and you feel the trailer pushing your vehicle, increase the gain.
- If the trailer brakes feel too strong, causing the trailer wheels to lock up or jerk, decrease the gain.
The goal is for the trailer to brake smoothly and equally with your tow vehicle. It must neither push nor pull. Adjust until you achieve a comfortable and controlled stop.
Common Errors During Installation and Fixes
Even with the best intentions and a detailed guide, DIY installations sometimes encounter mishaps. Do not get discouraged if something does not work perfectly the first time!
Many common issues are straightforward to diagnose and fix. Here are some of the most frequent errors encountered during the trailer brake controller install procedure, along with their solutions –
1. No Power to the Controller / Controller Not Turning On
This is the most frustrating issue because it means nothing works.
The Error
- Blown Fuse: This is the most frequent culprit. The factory fuse for the brake controller circuit might be blown. If you installed an inline fuse, it could be faulty or improperly connected. Overloading the circuit during a test or a short can cause this.
- Incorrect Power Source: Tapping the wrong wire for 12V constant power.
- Poor Ground Connection: The ground wire is not securely attached to a clean, unpainted metal surface on the vehicle’s chassis.
- Loose Harness Connection: The vehicle-specific wiring harness is not plugged into the factory port. It may not be fully seated in the brake controller’s back.
Fixes
- Check Fuses: Locate the fuse box. Consult your vehicle’s owner’s manual for the exact fuse location and amperage for the trailer brake controller circuit. Replace any blown fuses with a fuse of the same amperage. If you installed an inline fuse, check that as well.
- Verify Power Source: Use a multimeter or circuit tester to confirm you have a consistent 12V power supply. If using a plug-and-play harness, ensure the factory port is indeed powered.
- Inspect Ground: Ensure the ground wire is securely fastened to a clean, bare metal surface. If using a self-tapping screw, scrape away paint around the screw hole. Poor ground is a prevalent cause of electrical issues.
- Reseat Connections: Unplug and firmly re-plug the ends of your wiring harness. Listen for a click.
2. Trailer Brakes Not Engaging / No Output to Trailer
The controller lights up, but the trailer brakes do not respond when you press the pedal or use the manual override.
The Error
- Missing or Incorrect Brake Signal: The controller is not receiving a signal from your vehicle’s brake pedal. The cause can be a loose connection on the brake light switch wire.
- Trailer Wiring Issue: The problem might not be with the controller or your vehicle’s wiring but with the trailer’s wiring or brake components.
- Loose connection at 7-Pin Connector: The connection may be faulty during a 7-pin trailer brake controller installation.
- Controller Not Sensing Trailer: Some controllers need to sense a trailer connected before they will output power.
Fixes
- Check Brake Signal: Using a multimeter or circuit tester, verify that the brake signal wire receives 12V when the brake pedal is pressed.
- Inspect Trailer Connection: Ensure the 7-pin connector is clean, corrosion-free, and fully seated. Wiggle it gently to see if the connection is intermittent.
- Test Trailer Separately: If you have access to another tow vehicle with a working brake controller, try connecting your trailer to rule out issues with the trailer’s brakes or wiring.
- Consult Controller Manual: Some controllers have specific requirements for trailer detection. Ensure you meet them for full functionality.
3. Harsh Braking / Trailer Skidding
The trailer brakes too aggressively, causing an uncomfortable or unsafe stop.
The Error:
- Gain Set Too High: Your controller’s gain setting is adjusted too high, sending too much power to the trailer brakes.
- Improper Mounting: If you have a proportional controller, it must be mounted level and in the direction of travel. If tilted, mounted sideways, or upside down, its internal accelerometer will not read deceleration correctly, leading to erratic braking.
Fixes:
- Adjust Gain: Gradually reduce the gain setting on your controller. Perform repeated test stops in a safe area until the trailer brakes smoothly in sync with your tow vehicle without pushing or skidding.
- Check Mounting: Verify that your proportional controller is mounted correctly. Level it with the ground and orient it so that the front of the controller faces the front of the vehicle. Remount if necessary.
4. Weak Braking / Trailer Pushing Vehicle
The trailer is not braking enough, making your tow vehicle work harder to stop.
The Error:
- Gain Set Too Low: The gain setting is too low and does not send enough power to the trailer brakes.
- Poor Electrical Connection to Trailer Brakes: Corrosion or loose wires in the trailer’s brake system or at the 7-pin connector. It reduces the power reaching the brake magnets.
- Trailer Brake Issues include worn brake shoes/pads, seized adjusters, or faulty brake magnets on the trailer.
Fixes:
- Adjust Gain: Gradually increase the gain setting on your controller. Test drive and adjust until the trailer effectively slows the entire rig.
- Inspect Trailer Side: Check the wiring and connections on the trailer brake system, including the primary power wire from the 7-pin plug to the brake axles. Look for corrosion, frayed wires, or loose connections.
- Trailer Brake Maintenance: If the electrical checks out, the issue might be mechanical within the trailer’s brakes. This might require a professional inspection of the trailer’s brake assemblies.
These are systematic troubleshooting methods for these common errors. If you can pinpoint the issue, fixing it is quick.
The Best DIY Trailer Brake Controller Install Guide with Top Shelf Trailers
We hope you have successfully navigated the intricacies of the DIY trailer brake controller install procedure. From understanding the intricacies to troubleshooting, you have the knowledge and confidence to tow your trailer safely.
This is more than an innovative and affordable way to install a trailer brake controller. The DIY plan offers a deeper understanding of your vehicle and enhances your towing capabilities. Furthermore, you can completely forget how much to install a brake controller.
With your new brake controller properly installed and adjusted, you’re ready for smoother stops and greater control.
And when you are ready to upgrade your towing experience further, remember Top Shelf Trailers. We offer the best quality dump trailers in the United States, engineered for durability, performance, and your next great adventure.
For further trailer brake controller install guidance or customizing dump trailers, feel free to consult!
