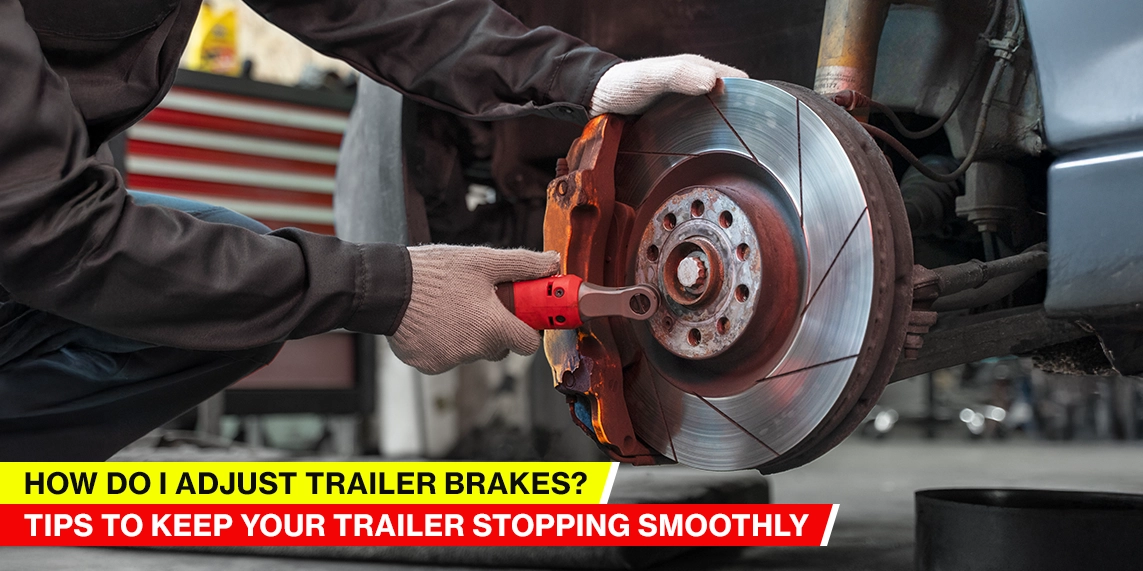
How do I adjust trailer brakes? If you are presently concerned with this, let us help you.
Trailer brakes contribute to safe towing. Whether you are a beginner or not, you already know trailers are heavy. The better the brakes, the better the stopping ability, and thereby, safe towing.
However, not all trailers have self-adjustable brakes. Some require a manual touch. Today, we will teach you how to adjust trailer brakes.
Electric brakes are all the hype in the present market. They are seamlessly connected to the towing vehicle’s brake and function accordingly. They are more precise and perfect for trailers with higher GVW or Gross Vehicle Weight.
In this comprehensive read, we will learn about adjusting trailer brakes. We will break down their functionalities and explore the common signs that demand adjustment.
Let’s begin.
How Does Electric Brake on a Trailer Work?
Before answering your question, ‘How do I adjust trailer brakes?’, let us learn how electric brakes work.
So, what is a trailer brake system?
As the name suggests, electric trailer brakes ensure a safe towing experience. They connect with the towing vehicle’s braking mechanism and work simultaneously.
So, when you activate the towing car’s brake, it activates within the trailer. However, there are other mechanisms to keep in mind.
While the brakes work in sync, trailer brakes have a separate system that needs to be adjusted to work in conjunction with the towing vehicle.
The electric brake adjustment mechanism on trailers uses an electrical circuit. The electromagnetic plates ensure the brake pads come to a halt. The mechanism draws power from the towing vehicle to control the brake pads.
However, a trailer brake controller is used to control this power. This trailer brake adjustment tool ensures that the trailer brake gets activated. Without it, the trailer brake would not function. Similar to trailer brake adjustment, you can DIY trailer brake controller installation.
Adjusting trailer brakes, especially electric ones, is straightforward. Most present-day trailers allow this. However, setting trailer brakes works differently for different types of trailers.
Learning the signs of a much-needed adjustment is vital before mastering the technique.
Signs You Need a Trailer Brake Adjustment
Whether hauling a boat or transporting equipment for a job, your trailer’s brakes need to be in top condition. Ignoring the signs of maladjusted brakes can lead to dangerous situations. It can increase stopping distances and even lead to loss of control and accidents.
So, when is the time to pay attention to your trailer brakes?
Through various subtle cues, your trailer will often tell you that a brake adjustment is due. Paying close attention to these warning signs –
1. Trailer Pulls to One Side During Braking
One of the most concerning signs of maladjusted trailer brakes is when the trailer pulls to one side. It is a significant safety hazard.
It occurs when the brakes on one side of the trailer are engaging more aggressively than the other. The imbalance creates an uneven braking force, effectively tugging the trailer toward the stronger brake.
A trailer pulling to one side compromises the ability to maintain a straight line. Even in everyday braking situations, the constant pull stresses the towing vehicle unnecessarily.
2. Braking Feels Jerky or Delayed
A jerky or delayed braking indicates that an adjustment is in order.
It means an inconsistent application of braking force. It can be due to uneven wear on the brake drums or shoes. If brakes are delayed, it means there is too much slack in the system.
In electric brake systems, this could indicate an issue with the brake controller’s sensitivity. The root cause lies in the mechanical adjustment of the brakes themselves.
Delayed braking significantly increases your stopping distance. It can be critical when you need to stop quickly to avoid an obstacle or an accident. On the other hand, jerky braking can lead to uncomfortable and unsettling driving experiences. In severe cases, it can cause the trailer to “push” the tow vehicle, leading to instability and a loss of control.
3. Screeching Noises or Overheating
While some brake noises can be normal, persistent screeching, grinding, or squealing sounds are a concern. Excessive heat from the wheel hubs after a short drive is another serious sign.
Screeching noises indicate improperly adjusted brakes and components rubbing or vibrating excessively. Overheating is usually caused by dragging brakes, which means they are partially engaged even when you are not pressing the brake pedal.
The constant friction generates excessive heat, leading to premature wear of brake components.
Beyond the annoying noise, screeching brakes are less effective at stopping. They indicate a need for immediate attention to prevent further damage. Overheating is even more critical. It can cause brake fluid to boil, leading to a complete loss of braking power. It can further warp brake drums, degrade wheel bearings, and, in extreme cases, cause tire blowouts.
4. The trailer Doesn’t Slow Down Proportionally with the Tow Vehicle
It is a sign that your trailer is not slowing down in proportion to your tow vehicle. The issue arises when the trailer brakes are too loose or improperly adjusted. This means they are not engaging with enough force to contribute to the overall braking effort.
It could also be a symptom of a weak brake controller setting. The controller can only do so much if the brakes’ mechanical adjustment is off.
When the trailer does not brake proportionally, the tow vehicle’s brakes are subjected to stress and wear. This increases the stopping distance and makes it harder to react to sudden stops.
In severe cases, this pushing sensation leads to jackknifing, especially on downhill grades or during emergency braking.
Paying attention to these warning signs is crucial for safe towing. Ignoring them only puts you and the cargo at risk. If you experience any of these symptoms, it indicates that your trailer brakes need adjustment.
Do not wait for a dangerous situation; be proactive about correctly setting trailer brakes.
Trailer Brake Adjustment Tool
Adjusting your trailer brakes sounds like a complex task. However, it is a manageable DIY project for trailer owners with the right tools.
You do not need a massive arsenal of specialized equipment. Most of what you will require is likely already in your toolbox.
So, before adjusting electric brakes on a trailer, make sure to have the right trailer brake adjustment tool.
1. Flathead Screwdriver or Brake Spoon Tool
It is arguably the most critical tool for the actual adjustment. Many trailer brake adjusters are accessed through a small slot in the brake backing plate. A regular flathead screwdriver with a thin blade often does the trick. However, a dedicated brake spoon tool is specifically designed for trailer brake adjustment.
Its slight bend and thin profile allow easier manipulation of the star wheel. A brake spoon is a worthwhile investment if you plan on doing this often.
2. Jack and Jack Stands
Safety first! Before you adjust your brakes, you must lift the trailer wheel off the ground.
It is essential to have a sturdy hydraulic jack suitable for your trailer’s weight. Once the wheel is lifted, jack stands are always used to support the trailer securely.
Never rely solely on the jack, as it can fail and cause serious injury. Position the jack stands on a solid, level surface, ideally near the axle on the trailer’s frame.
3. Wheel Chocks
Place wheel chocks on the tires that remain on the ground to prevent the trailer from rolling. They provide an additional layer of safety and stability.
4. Lug Wrench
You will need a lug wrench to remove the lug nuts from the trailer wheel. Ensure the wrench is the correct size for your trailer’s lug nuts. An impact wrench can speed up the process; however, a standard lug wrench works perfectly fine.
5. Gloves and Safety Glasses
Protecting your hands and eyes is paramount when working on any vehicle. Brake dust can be irritating, and small debris flies often. Always wear appropriate personal protective equipment (PPE) when adjusting trailer brakes.
6. Owner’s Manual or Trailer-Specific Information
While not a tool, the trailer’s owner’s manual or specific information from the manufacturer is invaluable. It contains instructions, torque specifications for lug nuts, or diagrams unique to the brake system. Always consult it if you have one.
With these simple tools, you will be well-equipped to tackle trailer brake adjustment. Proper tool knowledge contributes to your safety and peace of mind on the road.
How Do I Adjust Trailer Brakes? – A Step-by-Step Guide
Now that you understand why adjusting your trailer brakes is vital let us explain how. Electric trailer brakes are drum brakes. Their adjustment involves a star wheel mechanism that expands or contracts the brake shoes inside the drum.
The process requires careful attention to detail; it is a simple DIY with the right approach.
Before You Start: Safety First!
- Choose a safe, level spot. Park your tow vehicle and trailer on a flat, solid, and level surface away from traffic.
- Chock your wheels correctly. Place them securely on the tires to prevent accidental trailer rolling.
- Engage tow vehicle parking brake for added security. Release the trailer parking brake, if applicable. Ensure it is fully disengaged before you begin.
Above all, wear safety gear like safety glasses and gloves before you start.
Step 1: Lift and Secure the Trailer Wheel
- Start by jacking up a wheel. Using your sturdy hydraulic jack, lift one trailer wheel off the ground until it can spin freely. It does not matter which wheel you start with. You will need to repeat this process for each wheel. Always place the jack under the trailer frame, not directly on the axle. It contributes to better stability and prevents axle damage.
- Once the wheel is lifted, immediately position a jack stand securely under the trailer frame. Never work under a trailer supported only by a jack. It is a machine; failures can happen.
Step 2: Locate and Access the Adjustment Slot
- Find the Backing Plate. Look at the back of the brake assembly, behind the wheel hub. This is called the backing plate.
- There is a small, oval, or circular slot on the lower edge of the backing plate. A rubber or plastic plug usually covers it. Remove the plug.
- Pry out the plug using your flathead screwdriver or the tip of your brake spoon tool. It will expose the star wheel adjuster inside. If there are two slots, the star wheel might be behind either, depending on which side of the trailer you are on. Trailers differ from each other, and features vary.
Step 3: Adjust the Star Wheel
- Look through the access slot. You should see a small, toothed gear – this is your star wheel adjuster.
- Give the trailer wheel a good spin. You will use the wheel’s rotation to gauge your adjustment.
- Tighten the brakes by inserting the flathead screwdriver, engaging with the teeth of the star wheel.
- The goal is to turn the star wheel in the direction that expands the brake shoes. It means moving the tool handle down to push the star wheel’s teeth up.
- Turn the star wheel one click at a time. After each click, spin the trailer wheel and listen for a slight drag or scraping sound.
- Keep tightening the star wheel, one click at a time. Keep spinning until you feel a noticeable drag or resistance. You might hear the brake shoes lightly scraping against the inside of the brake drum.
Step 4: Back Off for Proper Clearance
- Loosen the brakes or retract the shoes. There will be a noticeable drag, and you need to back off the adjustment slightly.
- To do this, turn the star wheel in the opposite direction. This usually means moving the tool handle to push the star wheel’s teeth down. Back off the star wheel with about 8 to 10 clicks.
- Spin the wheel again. It should now turn relatively freely, but there will be a consistent drag. The slight drag is crucial; it ensures the brakes are properly seated and ready to engage.
Step 5: Replace the Plug and Repeat for Other Wheels
- Once you are satisfied with the adjustment, reinsert the rubber or plastic plug into the slot. It keeps out dirt, moisture, and debris.
- Carefully lift the trailer with the jack, remove the jack stands, and lower the trailer to the ground.
- Move to the next trailer wheel and repeat the steps to adjust all brake assemblies uniformly. It contributes to a balanced braking.
Step 6: Test Drive and Fine-Tune Brake Controller
- Connect your trailer to your tow vehicle. Drive to an open, level area with plenty of space and no traffic. Drive at a slow speed and manually activate the trailer’s brake controller. Observe how the trailer brakes.
- If the trailer brakes feel too weak and the tow vehicle does the same, increase the gain or output. If the trailer brakes feel too aggressive, decrease the gain setting.
The goal is for the trailer to decelerate smoothly and proportionally with the tow vehicle. It should neither push nor pull excessively.
Alternative Method: Adjusting Trailer Brakes by Backing Up
The manual star wheel adjustment method is the most precise way to set up your electric trailer brakes. However, some modern trailers come equipped with self-adjusting brakes.
They are designed to take up slack as the brake shoes wear automatically. The mechanism reduces the need for frequent manual adjustments.
Even with self-adjusting brakes, a specific backing-up procedure is often recommended. It ensures they are correctly set, especially after initial installation or significant service.
1. Adjusting Trailer Brakes by Backing Up
Self-adjusting brakes have a mechanism that activates when the trailer is rolling backward. It engages the star wheel adjuster, tightening the brakes incrementally.
Here is the procedure –
- For example, with manual adjustment, choose a large, level, and empty area, like a deserted parking lot. Ensure there is ample room to maneuver your tow vehicle and trailer.
- Connect your trailer to your tow vehicle as you normally would for towing. Drive forward a short distance to ensure everything is settled.
- Engage your trailer brakes; this is crucial. Shift the tow vehicle into reverse. As you slowly back up, activate your trailer’s brake controller. You want to apply enough force to feel the trailer’s brakes engaging, not too much.
- Repeat this cycle approximately 5 to 10 times. The self-adjusting mechanism should tighten the shoes when you back up and apply the brakes. You will hear faint clicking sounds as the adjusters work.
- After completing the cycles, drive forward and test the brakes. The trailer brakes should feel more responsive and balanced. You may still need to fine-tune the controller’s gain setting for optimal performance.
This method is most effective for trailers equipped with self-adjusting brakes. It will not work if your trailer has older, manually adjusted brakes. To understand this better, check your trailer’s owner’s manual or manufacturer’s specifications.
2. Setting Trailer Brakes with a Brake Controller
The final step is performance once you have meticulously adjusted the physical brake mechanisms.
A well-adjusted brake controller ensures the trailer brakes work with your tow vehicle’s brakes. It can prevent dangerous pushing, pulling, or excessive stopping distances.
There are generally two main types of brake controllers –
Proportional Controllers
These are the most common and highly recommended. They sense the deceleration rate of your tow vehicle and apply proportional braking force. This means that if you brake lightly, the trailer brakes lightly; if you brake hard, the trailer brakes hard.
They offer a smoother and more natural braking feel.
Time-Delayed (or Basic) Controllers
These apply a predetermined braking force to the trailer after a set delay. The mechanism works regardless of how hard you press your tow vehicle’s brake pedal. While less sophisticated, they can still work. However, this type of controller requires a more careful initial setup.
Regardless of the type, the goal is to synchronize your trailer’s braking with your tow vehicle’s.
Here is how to properly set your trailer brakes using your brake controller –
- Ensure the trailer is securely hitched to your tow vehicle, the safety chains are crossed, and the electrical umbilical cord is firmly plugged in.
- Locate Your Controller: Familiarize yourself with your brake controller. Know the position of the gain adjustment buttons and the manual override lever.
- Drive to a safe, level, and open area with little traffic. An empty parking lot, a quiet rural road, or a large, unused field is ideal.
- Before driving, set your brake controller’s gain to a relatively low setting. We suggest starting at around 20-25%.
- Drive your tow vehicle and trailer forward and accelerate to about 20-25 mph. Maintain a steady speed.
- While maintaining this speed, firmly activate the manual override lever on the brake controller. This applies only to the trailer brakes.
Your gain setting is too low if you feel a little brake from the trailer. If the trailer’s tires lock up or you feel a significant, uncomfortable tug, your gain setting is too high.
The ideal setting is when you feel the trailer’s brakes engaging without locking up. You should feel a slight, smooth tug or drag from the trailer. It indicates it is doing its fair share of the braking and not causing the tow vehicle to surge forward.
Remember, gain settings might need minor adjustments based on road conditions. A fully loaded trailer will require a slightly higher gain setting than an empty one.
Always pay attention to how your trailer feels behind you. Any jerky movements, excessive noise, or changes in performance warrant a check.
Maintenance Tips for Smooth Operation
Like any critical component of your towing setup, trailer brakes require ongoing attention. Proper maintenance ensures they remain safe, efficient, and reliable. Regular upkeep prevents issues before they become serious problems, saving you time and money and avoiding potential roadside headaches.
Here are essential maintenance tips to keep your trailer brakes operating smoothly and safely –
- Perform regular visual checks. Before each trip, check the wheels and tires for any signs of damage or unusual wear. Also, check for visible wiring issues or fluid leaks around hydraulic brake lines.
- Go for a detailed trailer check monthly or quarterly. Inspect the electrical wiring leading to each brake assembly for frayed wires, cracked insulation, or loose connections.
- Check that the emergency breakaway switch and its cable are functional. For hydraulic systems, check the brake fluid reservoir level. Inspect brake lines for any signs of leaks or damage.
- Look for uneven wear on brake shoes. If one side is more worn, it could indicate an issue with the adjuster or a bent component.
- When checking for shoe/pad wear, inspect the brake drums or rotors for scoring, warping, or wear. Light scoring can sometimes be machined out, but deep grooves or warpages often necessitate replacement.
- Periodically test the manual override lever on your brake controller. If you notice changes in trailer behavior, especially after loading, re-calibrate the gain setting.
- The slot on the brake backing plate where you access the star wheel adjuster accumulates dirt and grime. Keep the slots clean to ensure the rubber plug fits snugly and to make future adjustments easier.
If unsure of any brake maintenance or adjustment aspect, do not hesitate to consult a qualified trailer mechanic
Confidence on the Road Starts with Quality Trailer Brakes
Understanding trailer brake adjustment is crucial whether you are new to trailers or seasoned. We hope this comprehensive read has answered your query about ‘How do I adjust trailer brakes?’
The procedure is fundamentally for safety. Every step is necessary, from recognizing when to adjust to understanding the tools.
We have discussed the step-by-step process for manual and self-adjusting trailer brakes. Trailer brake adjustment now seems possible.
Always ensure a harmonious and controlled stopping experience. Look for unexpected signs and implement regular checks. Do not underestimate the peace of mind of knowing your trailer’s brakes. Take the time, follow these guidelines, and enjoy safer, smoother journeys.
Top Shelf Trailers is ready to serve if you are looking for the best-rated trailer brakes. We are a leading trailer manufacturing company in the United States. We are your one-stop destination for quality dump trailers, trailer brake replacements, hitches, and more.
Consult Top Shelf Trailers today for all your towing needs!


