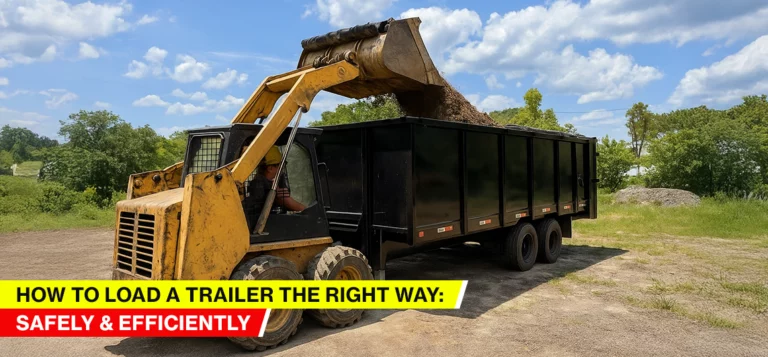
Are you looking for a flatbed to transport a vehicle, or want to check the condition of the trailer brakes?
Effective brake burnishing enhances your vehicle’s overall safety and prolongs the lifespan of its components.
When contaminants accumulate on brake rotors and pads, their effectiveness is reduced. This leads to uneven wear and tear, which affects the brake system.
You must ensure they are road-ready through effective brake burnishing. It is carried out on the brake pad and rotor, ensuring a proper combination of the two components.
It helps develop contact between the brake pads and rotors, thereby enhancing braking performance.
In this comprehensive blog, we will explore how to burnish brakes and why it is necessary. We will also explore the essential tools and safety checks before burnishing, common mistakes to avoid, and learn the maintenance steps.
Let us start reading!
Understanding Trailer Brakes before You Start
A trailer brake system is a crucial safety element, ensuring the controlled stopping of a heavy-duty trailer. The design works efficiently with the towing vehicle’s braking system. It offers the additional braking momentum required to bring a heavy load to a secure stop.
Whether you are towing a travel trailer, utility hauler, or snowmachine trailer, stopping the power is vital.
Trailer brakes separate the braking system installed on the trailer. Once they are wired correctly, they function as your tow vehicle brakes. It helps you safely slow down the entire load.
The truck bears the full burden of stopping, which increases the stopping distance, wears out the truck’s brakes faster, and risks loss of control.
Let us explore the types of trailer brakes –
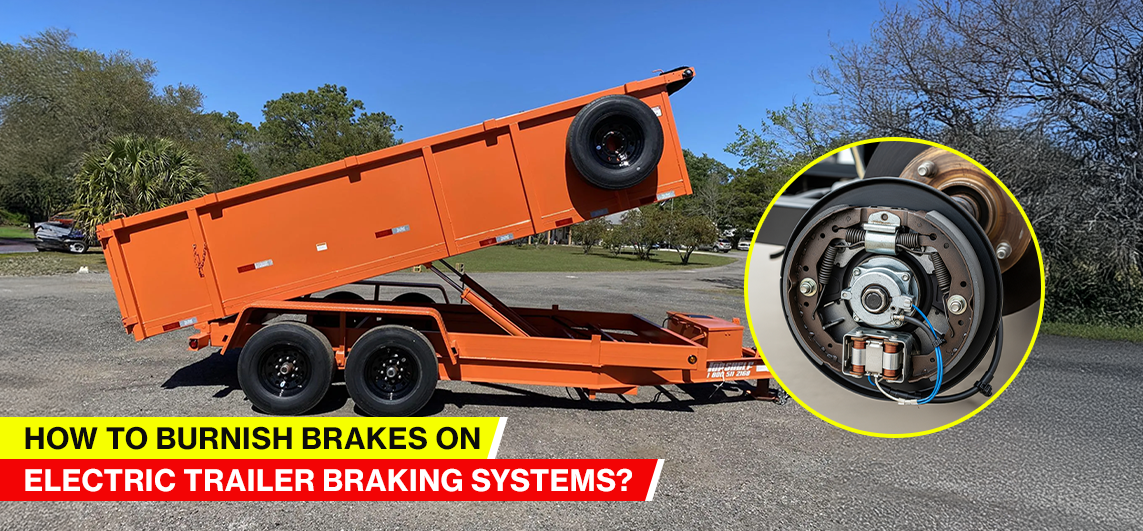
1. Electric Brakes
An electric brake system employs an electric current to engage the brakes. A brake controller in the towing vehicle transmits an electrical signal to the brake assemblies of the trailer. It is suitable for modern, heavier, or larger trailers, ensuring responsive control.
2. Hydraulic Brakes
A hydraulic braking system utilizes hydraulic fluid to transmit pressure from the brake pedal of the towing vehicle to the trailer brakes. Pressing the brake pedal causes hydraulic fluid to flow through a line to the trailer’s brake calipers. The heightened pressure causes the brake pads to grip the brake rotors, reducing the speed of the wheels.
3. Surge Brakes
A surge brake system depends on the trailer’s momentum to engage the brakes. When the tow vehicle stops, the trailer’s momentum takes it ahead. The movement triggers a lever system in the trailer’s brake mechanism, causing the brake shoes or pads to press against the brake drum.
4. Air Brakes
A brake system utilizes compressed air to ensure the smooth functioning of the brakes. A compressor in the towing vehicle creates compressed air, which is stored in a reservoir. It works by pressing the brake pedal and releasing compressed air into the trailer’s brake chambers. Then, it exerts pressure on the brake shoes or pads.
What Is Burnishing Brake and Why Do It?
Automotive braking systems depend on the friction constant between the brake pads and rotors. It ensures safe and reliable operation. You will notice the effect of this friction when you press the brake pedal.
After applying pressure, you will sense the first grip of the brake pads as they touch the rotor’s surface.
Brake burnishing aligns the brake pads and rotors to guarantee their performance remains consistent and reliable. With regular wear and overuse, they require replacement..
Through the process of brake burnishing, you can achieve the following goals, thereby contributing to improved performance and longevity.
They are –
- Incorporates abrasive brake pad substance evenly into the brake rotor’s surface to minimize irregularities.
- Enhance friction while ensuring uniform wear for smoother braking performance.
- Promotes thermal curing to minimize the chances of glazing.
- Heat circulates throughout the entire brake pad, minimizing early wear and overheating, which can lead to brake fade.
The brake burnishing procedure is simple and does not require extensive time or technical expertise. You must consider the significance of burnishing brakes according to the condition of the brakes.
Providing brake burnishing services helps you stand out and increase the longevity of the brakes.
Why is burnishing Your Trailer Brakes Important?
Burnishing your trailer brakes is a crucial step for ensuring both safety and performance. When new brake pads, shoes, or drums are installed, their surfaces require time and controlled use to mate with each other properly.
Without burnishing, brakes may feel weak and uneven. Properly burnished brakes provide smoother stops and better control.
It is beneficial when towing heavy loads and helps extend the lifespan of your entire braking system. It also helps improve braking efficiency, minimize uneven wear, and reduce brake noise.
Here are some of the reasons why burnishing your trailer brakes is essential:
1. Enhancing Braking Consistency
It is essential to form a uniform and properly aligned surface between the brake pads or shoes and the rotor.
Burnishing contributes to a reliable and steady braking experience. It allows you to keep control and safety during emergency halts or severe braking.
2. Improving Heat Dissipation
Burnishing brakes causes them to heat up, enabling the application of a slim layer of friction material onto the braking surface.
This layer helps enhance heat dispersion during standard braking, lowering the chances of overheating and brake fade.
3. Meeting Manufacturer Specifications
Generally, brake manufacturers recommend a specific burnishing method to ensure their products function properly.
Following these guidelines maintains warranty protection and ensures the brakes conform to the manufacturer’s standards for safety and performance.
When Should You Burnish Brakes?
Burnishing trailer brakes is an essential maintenance process that ensures optimal braking efficiency and safety. Burnishing the brakes helps fix slowly wearing brake pads or shoes, as well as drums or rotors, to form a smooth, uniform contact surface.
Here are the key times when you should burnish your trailer brakes:
1. Following the Installation of New Brake Parts
Every time you put new brake shoes, pads, drums, or rotors on your trailer, burnishing is crucial. New parts have surfaces that must fit together correctly. Burnishing helps in removing manufacturing residues. It ensures optimal friction, essential for efficient braking.
2. After Long Periods of Inactivity
If your trailer is unused for a long time, the brake surfaces accumulate rust or become shiny. Burnishing the brakes after storage helps reestablish the correct contact between the pads/shoes and rotors/drums, thereby enhancing braking performance.
3. After Repairs or Adjustments
Whenever you maintain or fix your trailer brakes, you need to burnish them. It may include changing springs, hardware, or making significant adjustments. This method ensures that the elements operate in harmony and restore reliable braking strength.
4. Reduced Braking Performance
If you experience reduced or inconsistent braking, the brake burnishing procedure can help regain responsiveness. It can smooth out slight surface flaws and restore ideal friction between the parts.
5. Before Heavy or Long-Distance Hauling
Before starting your journey or transporting heavy items, it is essential to properly inspect and adjust your trailer brakes to ensure optimal functioning. It helps in avoiding excessive heat and brake fading, particularly under heavy use.
Tools and Safety Checks before Burnishing
Before you begin the burnishing process, it is crucial to have the right tools and perform essential safety checks.
You must ensure your trailer is securely positioned and that all brake components are correctly installed. Performing these checks reduces the chance of accidents. It also ensures that your burnishing results are safe and effective.
The tools and safety checks are as follows –
1. Wear Protective Gear
A crucial initial step in brake burnishing and repair safety is ensuring you are adequately safeguarded. Dealing with brake systems frequently requires handling sharp elements, heated components, and dangerous substances.
The necessary protective gear includes –
- Safety Glasses: Must have safety glasses to protect your eyes from brake fluid, debris, or particles. These elements could scatter while handling brake parts.
- Gloves: Rubber gloves will safeguard your hands from brake fluid, grime, and grease. They will help eliminate the chance of injury from sharp edges on brake components.
- Sturdy Footwear: Use steel-toe boots or shoes to safeguard against falling objects or heavy materials. These incidents can lead to significant injury if they land on your feet.
- Long Sleeves and Pants: Protect your skin from burns or contact with hazardous materials, such as brake fluid or heated components, by fully covering it.
2. Properly Lift and Secure Your Vehicle
When performing maintenance on your brakes, it is essential to elevate your vehicle off the ground to ensure proper access and work. Incorrect lifting or insufficient support may result in accidents, such as the vehicle dropping, which can lead to injury.
Steps to follow –
- Use a Proper Jack: Always use a reliable hydraulic jack designed for the weight of your vehicle. Avoid using a temporary jack or any that is not suitable for your vehicle’s specifications.
- Secure the Car with Jack Stands: Avoid relying solely on the jack to hold the car up after it has been raised. Jack stands are crucial for stabilizing the vehicle firmly while you perform your tasks on it.
- Test Stability: Once the vehicle is lifted, gently push it to confirm stability before proceeding with the repair.
3. Follow the Manufacturer Specifications
Adhering to the manufacturer’s detailed guidelines will help you achieve optimal outcomes. They have the most in-depth knowledge of their braking components and can always offer the best recommendations. It helps optimize the performance of the trailer’s parts.
Step-by-Step Brake Burnishing Procedure
| Step | Action | Purpose / Notes |
| 1 | Inspect Brakes | Check for wear, damage, or contamination before burnishing |
| 2 | Install Brakes | Ensure proper installation and correct torque |
| 3 | Initial Burnish | Apply light braking at low speed to gradually seat the pads/shoes |
| 4 | Moderate Burnish | Apply medium braking, avoid hard stops; continue to build friction surface |
| 5 | Final Burnish | Perform controlled stops at higher speed to fully condition brakes |
| 6 | Post-Burnish Inspection | Check for abnormal wear, noise, or vibration |
Properly burnishing your trailer brakes is crucial for maximum performance and safety. Following a step-by-step guide allows new brake parts to stop uniformly. It ensures smooth braking and prolongs the lifespan of the brakes.
By adhering to every step of the procedure, you will attain optimal efficiency from your brakes. It will also minimize the chances of early wear or inconsistent performance.
The steps to follow are –
1. Preparation
Ensure that all hitch connections, including electrical connections, sway bars, and breakaway cables, are thoroughly inspected and fastened securely.
2. Initial Steps
- Adjust the trailer brake controller to deliver 8 to 10 volts of power.
- Increase the speed of the vehicle and trailer to 40 miles per hour.
- Slowly reduce the speed to 20-25 miles per hour without applying the brakes of the tow vehicle.
3. Burnishing Process
- In this process, you must maintain speeds up to 40 miles per hour.
- Use the trailer brake controller every mile and apply the brakes for short intervals.
- You must repeat this process 20 to 50 times until you observe a noticeable improvement in brake functionality.
4. Monitoring Progress
Stop at a secure spot once the procedure is finished. Look for typical indicators, such as smoke near the brake drum region. You can use a temperature gun to confirm temperatures are between 350 and 400°F.
5. Final Check
You must ensure the brake drum area feels hot when you hover your hand near it. If the area is cool, repeat the process to guarantee correct adjustment and functionality.
Bedding Brakes Procedure for Pads and Rotors
Properly bedding your brakes is crucial for peak performance and extended durability. Understanding this process will help you bed your new brake pads and rotors.
The given steps will also help you understand how to adjust the trailer brakes and place them correctly –
1. Find a Safe Location
You must look for a secure section of road where you can carry out the bedding-in procedure without any interruptions. Avoid congested streets or regions with high traffic.
2. Prepare Your Vehicle
Ensure your vehicle is parked correctly and firmly positioned to bed in the brake pads. Ensure the parking brake is applied and the transmission is set to park for automatic cars or to the gear position for manual vehicles.
3. Initial Driving
Start driving at a steady pace, gradually accelerating to approximately 30–40 mph. Gently apply the brakes to reduce speed without coming to a complete halt. Repeat this process multiple times to generate heat in the brake system.
4. Cool Down Period
After the first driving session, let the brakes cool down completely. Locate a secure area to park your car and leave it there for at least 10–15 minutes. Avoid applying the brakes during this cooling period to prevent uneven pad transfer.
5. Repeat the Process
After the brakes have cooled, repeat the driving procedure. Then slowly drive, accelerating and using moderate braking force. Look for multiple cycles of speeding up and slowing down to guarantee complete pad transfer.
6. Final Cooling
Once the second driving session is finished, allow the brakes to cool down again. Park your car and allow it to rest for at least 20-30 minutes without applying the brakes. This last cooling phase is crucial for securing the stability of the brake pads’ surface.
Common Mistakes to Avoid When Burnishing
| Mistake | Consequence | How to Avoid |
| Hard braking too early | Glazing or uneven wear | Gradually increase braking force |
| Overheating brakes | Reduced friction & premature wear | Allow cooling periods between stops |
| Ignoring inspection | Damage goes unnoticed | Always inspect brakes before and after burnish |
| Uneven loading | Pulling or noise | Evenly distribute trailer load |
While burnishing trailer brakes, inevitable mistakes can reduce their effectiveness and even compromise your safety. Being aware of these common errors, such as rushing the procedure or skipping essential safety steps, can help you achieve the best results.
Understanding what to avoid ensures your brakes function smoothly and last longer, giving you greater confidence on the road.
1. Neglecting Regular Inspections
One of the biggest mistakes car owners make is neglecting routine inspections of their braking system. Regular checks of burnishing brake pads, rotors, calipers, and brake fluid levels are essential. It helps to identify any issues early on and prevent costly repairs or accidents.
2. Ignoring Brake Warning Signs
Squealing, grinding, or vibrating sensations while braking are not to be ignored. These are warning signs indicating potential problems with your brakes. Ignoring them can lead to further damage and impact your safety on the road.
3. Overlooking Brake Fluid Maintenance
Brake fluid is critical for proper brake function. Over time, brake fluid can become contaminated or deteriorate, leading to decreased braking performance. Regularly flushing and replacing brake fluid according to manufacturer recommendations is vital for maintaining optimal braking efficiency.
4. Riding the Brakes
Continuous light pressure on the brake pedal, known as riding the brakes, can generate excessive heat and wear on brake components. This not only reduces braking effectiveness but also shortens the lifespan of brake pads and rotors. Avoid this habit by maintaining a safe following distance and anticipating stops.
5. Improper Installation of Aftermarket Parts
While aftermarket brake components may offer performance enhancements, improper installation can compromise safety and functionality. Always consult a professional mechanic and ensure proper installation to avoid issues such as brake fade or uneven braking.
Signs That Brake Burnishing Is Complete
Signs of a completed brake burnishing procedure are a smooth, consistent pedal feel and consistent stopping power. You will understand the absence of excessive heat, vibrations, or any unusual noises.
Let us discuss the common signs –
1. Consistent Braking Performance
After burnishing, your brakes should feel smooth and responsive every time you press the pedal. There should be no uneven grabbing, pulsing, or unpredictable changes in braking force. If each stop feels consistent, this is a strong indicator that the pads and rotors have bedded in properly.
2. Reduced Brake Noise.
During the initial stages of burnishing, it’s normal to hear squeaks, squeals, or grinding noises as new pads and rotors mate. Once burnishing is complete, these noises should significantly diminish or disappear altogether, signaling that the surfaces have properly conformed to each other.
3. Minimal Brake Dust
New brake pads may produce extra dust during the break-in period. As burnishing completes, you will notice less brake dust accumulating on your wheels. It indicates that the pads are wearing evenly and efficiently.
4. No Noticeable Odor
Generally, you can smell a burnt, chemical odor during the first few stops as the pads and rotors heat up and bed in. This odor should fade quickly. If you no longer notice any strong smells after driving, it is a sign that the burnishing process is completed.
5. Visual Inspection
If you look through your wheels or remove them, the rotor surface should appear uniform and smooth. It should not have scoring, glazing, or uneven coloring. This indicates that the pad and rotor surfaces are making complete and even contact with each other.
Maintenance Tips after Burnishing Brakes
After burnishing your brakes, it is essential to allow them to cool completely by driving for a while without heavy braking. It enables proper heat dissipation and prevents glazing or other damage.
Regular maintenance, such as inspecting the brake fluid and pad thickness annually, is also essential for long-term brake performance.
Here are some of the essential tips to follow-
1. Regular Inspection
Frequently check your brakes for signs of wear, uneven pad thickness, or scoring on the rotors. Catching issues early can prevent more extensive damage and ensure continued safe performance.
2. Keep Brakes Clean
Brake dust and road debris can accumulate on pads and rotors, affecting performance. Wash your wheels and brake components regularly to minimize buildup and maintain smooth braking.
3. Brake Fluid Check and Replacement
Brake fluid transfers force from the brake pedal to the brakes. Over time, brake fluid absorbs moisture, resulting in decreased effectiveness and leading to brake failure. Check your vehicle’s owner’s manual for the recommended interval for replacing brake fluid, usually around every two years.
4. Brake Pad and Rotor Maintenance
Brake pads and rotors are integral to stopping your vehicle effectively. Visual inspections are your best friend in this situation. If your brake pads are less than a quarter-inch thick, it’s time to replace them.
If you notice grooves, cracks, or scoring on the brake rotors, it is time for maintenance. Keeping these components in good shape ensures reliable braking performance.
5. Listen for Unusual Noises
After burnishing, your brakes should be relatively quiet. If you notice any squealing, grinding, or clicking sounds, inspect the brakes and address potential problems.
6. Avoid Hard Braking When Possible
Try to avoid sudden, aggressive stops unless necessary. Controlled braking reduces wear on pads and rotors. It helps them last longer and maintain optimal performance.
Restoring Performance with Reliable Repairs at Top Shelf Trailers
Effectively maintaining your trailer brakes is essential for ensuring safety and optimal performance.
If you are still wondering how to burnish brakes, follow these guidelines for burnishing. It will help you in attaining maximum brake efficiency. You must prioritize safety while executing these procedures.
Maintaining your brake system is essential for ensuring your safety while driving. A well-functioning brake system enhances performance and provides protection. You should always focus on maintaining your brake system for a smoother, safer ride.
At Top Shelf Trailers, we provide reliable services to ensure the durability of your trailers. If you need any support with your dump trailers, we are your one-stop solution.
Reach out to us and get our speedy service!